We have an awesome solution development team at Arcus Data. We’re also a strong believer of developing Splunk applications that follow best practices. Personally, I’m also a big proponent of “shift-left testing”. NIST’s 2002 report on The Economic Impacts of Inadequate Infrastructure for Software Testing describes that the closer to/past the release of software, the cost of fixing the bug increases exponentially. For example, Table 5-1 in the report shows the cost of fixing an issue at customer handoff is 10 times larger than at the time of development. Over the long term, significant amounts of money can be saved by fixing issues early.
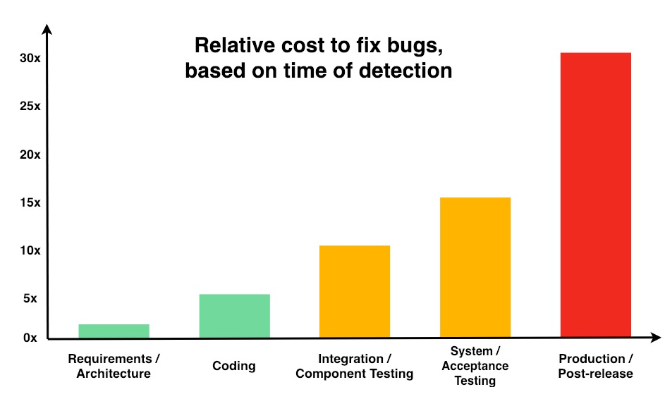
Figure - NIST The Economic Impacts of Inadequate Infrastructure for Software Testing - Relative Cost to Repair Software Defects
This is absolutely critical when we look at the rapid pace of our solution development. So how do we make sure deviations from best practices are caught quickly and checks are integrated into our development pipeline? We use Splunk’s AppInspect with AWS CodeBuild integrated into our GitHub repositories. Let’s take a closer look…
First, AppInspect is Splunk’s internal toolkit for validating the quality of apps or add-ons published to SplunkBase or certified for Splunk Cloud. AppInspect “evaluates your Splunk app against a set of Splunk-defined criteria so that you can be assured of the quality and robustness of your app.”
Second, about CodeBuild… “AWS CodeBuild is a fully managed continuous integration service that compiles source code, runs tests, and produces software packages that are ready to deploy.” Interestingly, the free tier AWS benefits for CodeBuild don’t expire after your 12 month free tier term. You can continue to get 100 build minutes of build.general1.small time per month which is more than adequate for Splunk AppInspect to run on. On average, a build takes a minute to complete including installing AppInspect. Let’s say we have a particularly busy month and go over the free tier allowance. Every 200 builds would cost us about $1. I think that’s a bargain for identifying issues early in the solution development process.
Setting Everything Up
Enough about the services themselves, let’s make them work together. First you’ll need to create a buildspec.yml file for CodeBuild to know what to do. I’ve created a sample file below you can copy and use for your project. (If you want to customize your build specification file, feel free to check out the documentation over at AWS: https://docs.aws.amazon.com/codebuild/latest/userguide/build-spec-ref.html)
Sample buildspec.yml file for Splunk AppInspect:
version: 0.2

phases:
  install:
    runtime-versions:
      python: 3.7
    commands:
      - wget http://download.splunk.com/misc/appinspect/splunk-appinspect-latest.tar.gz
      - pip3 install --no-cache splunk-appinspect-latest.tar.gz
  build:
    commands:
      - splunk-appinspect inspect $CODEBUILD_SRC_DIR --output-file appinspect.json
      - exit `cat appinspect.json | jq '.summary.failure'`
Pretty straightforward. We download the latest version of the AppInspect tarball, install it using pip, and then run splunk-appinspect to validate our Splunk app. But why the last line? Why are we forcing an exit command by extracting the summary.failure value from the AppInspect JSON output? Unfortunately for some reason, the AppInspect program will exit with a status code of 0 (meaning success) even if there are validation failures! This would mean we would see a successful build in GitHub. So that extra line helps us identify successfully packaged apps that have validation failures.
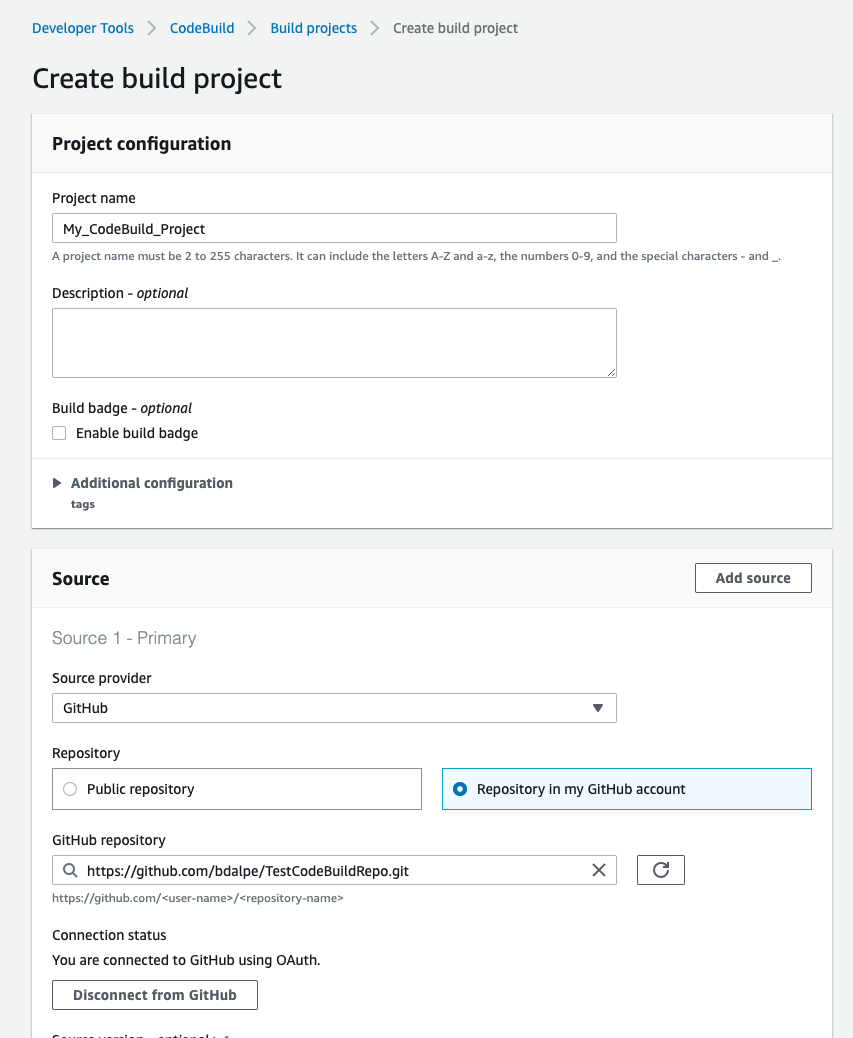
Now, how do we get CodeBuild to actually give us our magic build icons? Let’s sign into the AWS CodeBuild console.
Create a new project and choose your GitHub repository as the source. You will need to permit AWS to access your GitHub account using an OAuth token. If you’re a member of a GitHub organization, the admins will need to approve AWS to access your organization’s repositories.
You’ll want to use the Amazon Linux 2 Standard version 1.0 Linux runtime.

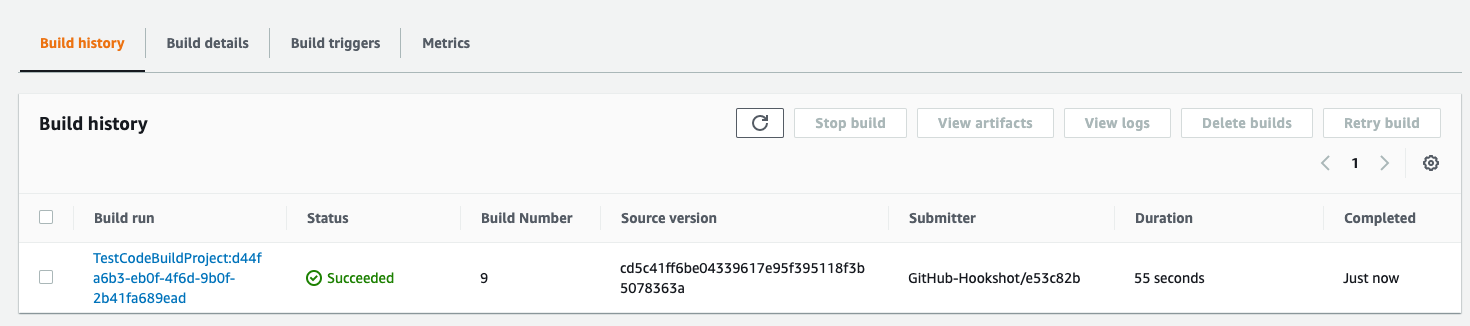
Once everything is set up, commit your buildspec.yml file to the repository. If everything goes well, you should see the following under the Build History:
Back in your Github repository, under the commit history, you should see the following (obviously with your own commit messages)

So what happens when you have issues with validation and get a failing build?

Uh oh, red cross showing failure on the build. Clicking on the details link will bring you to the CodeBuild build history details page where you can see the build output. In the example below, you can see there’s a few issues AppInspect identified with this project:
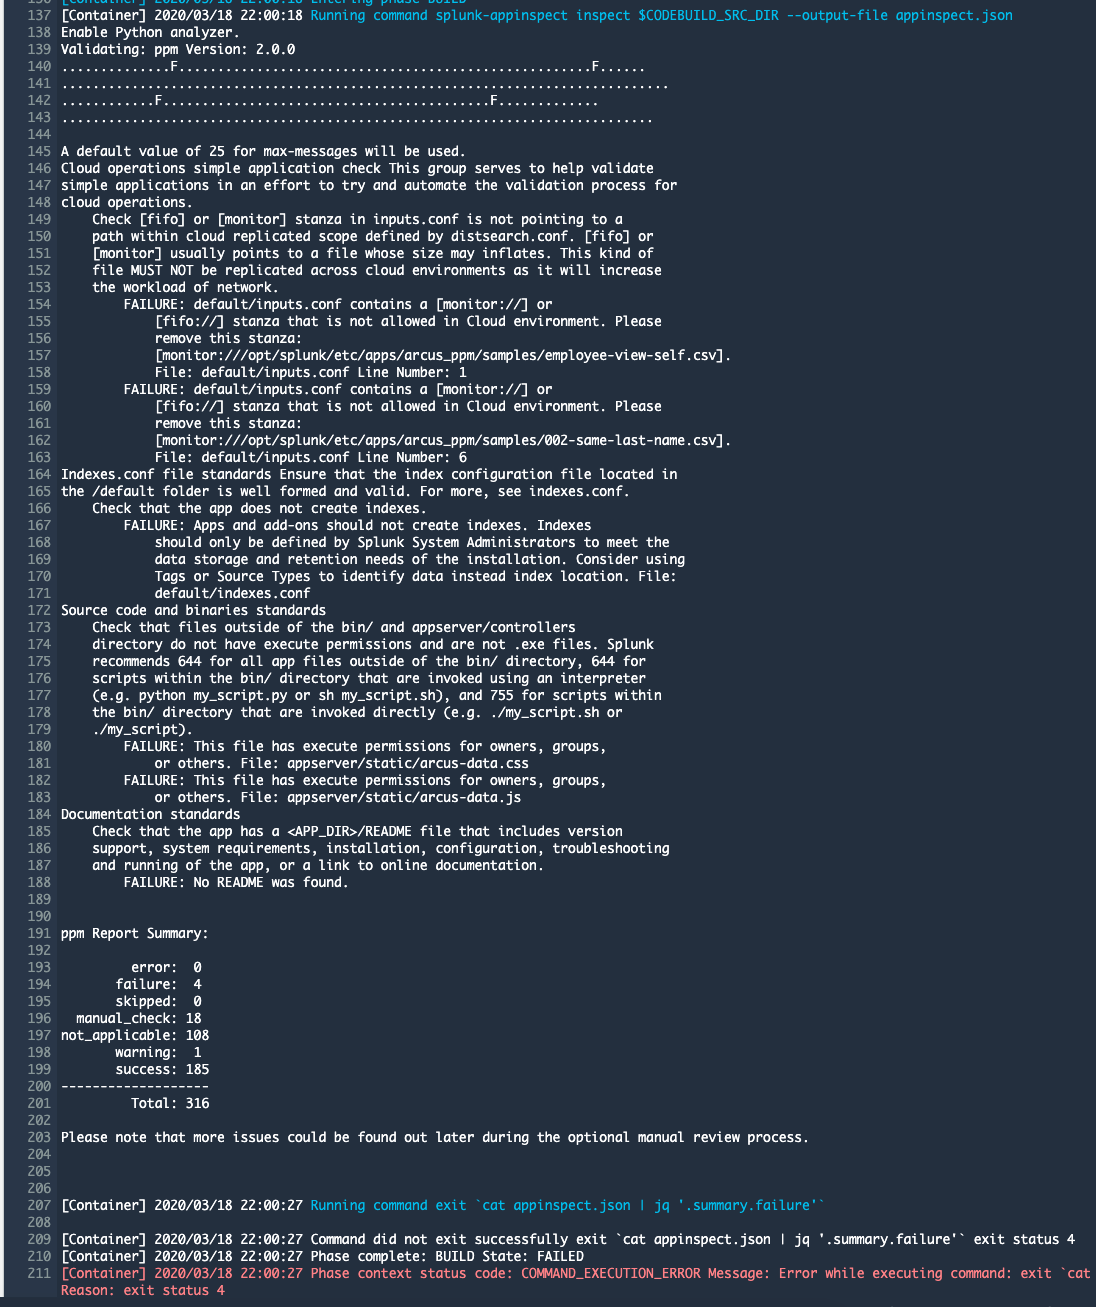
Great, now we can go fix our issues now before this becomes a bigger issue later on!
Branch Protection Rules
GitHub also has Branch Protection Rules that allow you to enforce checks to pass before a pull request can even be merged! Great for making sure code is up to standards before shipping out the door. In this case, the code above from the development branch, wouldn’t be eligible for merge with our master branch. At Arcus Data we follow the Git branching model and this AppInspect routine fits perfectly. (for more info on how this works, I encourage you to read this blog post: https://nvie.com/posts/a-successful-git-branching-model/)

Happy solution building!
Want more insight like this? Make sure to follow us on LinkedIn, Twitter and Facebook!